Chapter 3: Host environment setup
A new terminal can look exactly like the last one and still choose a different compiler. It can even report “command not found” while the compiler files are sitting where you left them. The files and the terminal’s knowledge of them are two different things.
An MCU IDE usually keeps that distinction out of sight by choosing tools with the project. Here we make the choice ourselves. The computer on your desk is the host: it edits and builds the code, inspects the result, and sends it to the i.MX6ULL target board. Our first job is to give the files a known home and make each terminal’s tool selection visible.
Part II’s examples use a workspace, two compilers, a serial-terminal program, and a USB download tool. All can be prepared with the board disconnected. The sections below separate project-local tool selection from hardware access and persistent host services. Reading the examples does not require installing or operating them:
When |
Sections |
Result to keep |
|---|---|---|
Host-only tool selection |
Compiler paths, a project-local |
|
Chapter 8 |
The serial/ROM reference commands in 3.5 and 3.8 |
Board connections and device identities, after the power checks |
Before Chapter 11 |
3.9 |
An identified spare card; no write in this chapter |
Network-boot examples, starting in Chapter 24 |
3.10 first, then 3.6 and 3.7 |
A stable address plan and deliberately started development servers |
The Windows-tool alternatives in 3.5a-3.5b are optional. Neither an SD card nor a network server is a prerequisite for Chapter 9’s USB-loaded LED experiment.
3.1 Choosing the host
We use x86_64 Ubuntu 22.04 LTS Desktop and its default Bash terminal as the reference host. The compiler archives in this chapter run on x86_64 Linux, so they cannot be launched directly in Windows or on an ARM64 host. Start with Ubuntu installed, either natively or in a dedicated virtual machine; installing the OS is outside this chapter. Ubuntu’s Desktop installation tutorial explains the installer, but select the reference 22.04 release rather than assuming every current release has identical packages. Server/minimal installations may use a different network manager and are not the reference recipe here.
Open Ubuntu’s Terminal application. This is where the host commands in the book belong. A $ at the start of a listing is a prompt marker, not a character to type; following lines without that marker are example output, except where a command continues onto the next line. Most commands run as your normal user. When a command needs authorization to change a system file or access a restricted device, we show sudo explicitly. It may ask for your login password; the terminal displays no characters while you type it.
Check the installed host before changing packages:
$ uname -m
x86_64
$ cat /etc/os-release
... Ubuntu 22.04 ...
uname -m reports the host machine architecture; cat displays a file’s contents. The second listing is abbreviated: look for Ubuntu and VERSION_ID="22.04" in your actual output. If these differ, resolve the host choice before following this recipe.
A dedicated VM keeps package and service changes inside that lab system. Plan for these connections, but do not attach the board in Chapter 3:
USB attachment to the guest for the serial bridge and ROM SDP device; a card reader is needed later for SD boot. Attachment means giving Ubuntu, rather than Windows, ownership of that USB device. Chapter 8 checks its appearance inside Ubuntu and reattachment after a USB identity changes.
A bridged or passed-through Ethernet adapter on the board’s lab link. Default VM NAT alone does not make guest TFTP/NFS servers reachable by the board.
Only one owner for each serial port: close a Windows terminal before attaching its bridge to the guest.
We can keep compiler files and compiler selection local to the project. Ubuntu packages and the optional service settings under /etc are different: they change the host system and remain after the terminal closes. Use the dedicated VM if you want those changes kept off your everyday installation. The later NFS recipe requires a disposable lab VM with no personal files or shared host folders. A validated power guide for the exact baseboard/core revision is still required before Chapter 8; the supplied schematic alone is not a universal power/jumper recipe.
3.2 Workspace layout
Consider the next time a build fails and you need to find the source you edited. It helps if that file is not buried among yesterday’s generated objects and downloaded archives. We use ~/imx6ull to keep those roles separate. The layout below will stay with us as the projects grow:
$ mkdir -p ~/imx6ull/{src,build,boot,rootfs,scripts,toolchains,notes}
$ cd ~/imx6ull
$ ls
.
├── boot       # bootable artefacts staged here, then dd'd to SD
├── build      # all out-of-tree build outputs (kernel, U-Boot, BusyBox)
├── notes      # configuration and diagnostic records
├── rootfs     # exported over NFS to the target
├── scripts    # helpers, shared between chapters
├── src        # upstream sources: linux, u-boot, busybox, your bare-metal code
└── toolchains # prebuilt Arm compilers kept local to this project
Read the first command before entering it. ~ means your home directory, and Bash expands {src,build,...} into one path for each name. mkdir -p creates those directories if they are missing. Then cd moves this terminal into the workspace and ls lists what is there. The annotated tree shows what the names mean; ordinary ls does not print that tree or its comments.
You will also see $HOME, the shell-variable form of your home-directory path. It lets the environment file below refer to your directory without embedding a particular username. A path without a leading / is relative to this terminal’s current directory; pwd prints that directory. A # starts a shell comment, such as the notes in the illustrative tree.
Two distinctions will save confusion later:
Sources and outputs have different roles. Edit tracked sources in
src/, including your own bare-metal files. Git records source changes against upstream. Where a project supportsO=, place generated output inbuild/; this does not move or apply source patches for you.rootfs/is the future NFS root. In the later NFS-root example, Linux uses files from this exported host directory without reflashing storage. Creating the directory alone does not configure NFS or boot the target.
3.3 Host packages
Not every program used during an Arm build runs on Arm. The host also runs tools that process configuration, generate source, and package files. Ubuntu supplies these helpers through its package manager, apt. The long installation below prepares those host jobs; our two Arm compilers will still be downloaded separately into the workspace.
apt update refreshes the package catalog; apt install installs the named packages and their dependencies. Read the proposed installation before answering its confirmation prompt. Packages ending in -dev generally supply headers and libraries needed to compile another program. These installations change Ubuntu, rather than just the project directory.
The trailing \ below joins the next line to the same command. It must be the last character on the line, with no space after it; the indented package names are continuation lines to enter, not output. Run each command in order and resolve errors before entering dependent commands. A returned prompt alone does not mean success.
$ sudo apt update
$ sudo apt install \
    build-essential bison flex libssl-dev libncurses-dev \
    bc kmod cpio rsync wget curl git unzip xz-utils xxd \
    device-tree-compiler u-boot-tools \
    minicom picocom \
    qemu-user-static binfmt-support \
    gdb-multiarch \
    pkg-config libusb-1.0-0-dev libftdi1-dev \
    libgmp-dev libmpfr-dev libmpc-dev libisl-dev \
    fakeroot dosfstools mtools parted nano usbutils python3
The list is long because it covers several later builds. You do not need to learn every package now, but the main groups have recognizable jobs:
build-essential,bison,flex,libssl-dev,libncurses-devprovide tools and libraries needed to build the kernel and U-Boot. The kernel uses OpenSSL during build for features such as module signing.bcprovides arithmetic used by parts of the kernel build.xxdprints a file’s bytes in hexadecimal; Chapter 7 uses it to inspect a boot image.device-tree-compilerprovidesdtc, which compiles a hardware description for the kernel: devices, their addresses, and how they are connected.u-boot-toolsprovidesmkimage,mkenvimage,dumpimage, andmkeficapsule.nfs-kernel-server,tftpd-hpaprovide network boot services; install them later in Sections 3.6-3.7 when needed, because package installation can start daemons.minicom,picocomare serial terminals. This book usespicocom.qemu-user-static,binfmt-supportlet the host emulate ARM user-space programs, not boot an ARM kernel. They become useful during root-filesystem preparation withchroot, which gives a process a different top-level directory for file lookup.gdb-multiarchis a GDB build that supports multiple architectures, including ARM.libusb-1.0-0-dev,libftdi1-devare needed when building USB and JTAG tools such asimx_usb_loaderand OpenOCD.OpenOCD is the host program that controls a JTAG adapter and exposes a GDB server.
fakeroot,dosfstools,mtools,partedmanipulate filesystem and SD-card images.
If apt cannot find a package on the reference Ubuntu release, stop and record the exact error and release. Check that apt update succeeded; do not substitute a similarly named package without checking what it provides.
3.4 The cross toolchain
The name gcc tells you which compiler family you called, not which processor its output will run on. Ubuntu’s ordinary gcc builds for the host PC. For our board, we need a compiler that runs on the PC but produces Arm instructions. That is a cross-compiler. Its linker, assembler, and inspection tools form a toolchain. Chapter 6 will make this difference visible by building the same C source for two targets.
We use two official prebuilt Arm toolchains because the target environments differ:
Linux target toolchain:
arm-none-linux-gnueabihf-Builds U-Boot, the Linux kernel, BusyBox, and target user-space programs. It targets 32-bit Arm Linux with the hard-float glibc ABI.Bare-metal toolchain:
arm-none-eabi-Builds the small no-OS experiments in Part II. It does not assume Linux, glibc, processes, or a dynamic loader.
Both archives go into the workspace, with their original directory names. We will not install another Arm compiler through apt or rename these folders. Keeping the two paths visible makes it easier to check which tool a build actually used.
Use 13.2.Rel1 for both targets in this edition. A fixed release gives the examples a consistent starting point; it is not a claim that every example has been tested on hardware with that release. The 13.2 release notes identify the host and target packages. The archive directory in this layout is:
$ mkdir -p ~/imx6ull/src/toolchains
$ cd ~/imx6ull/src/toolchains
In Ubuntu’s browser, download these four files from Arm and save them in that directory, retaining their exact names. If the browser saves to ~/Downloads, move them with the file manager. These release-specific links avoid having to find an older release on Arm’s changing download index:
Before extraction, return to the archive directory and check both files. sha256sum --check reads the filename and expected hash from a manifest, computes that archive’s hash, and reports whether they match:
$ cd ~/imx6ull/src/toolchains
$ sha256sum --check arm-gnu-toolchain-13.2.rel1-x86_64-arm-none-linux-gnueabihf.tar.xz.sha256asc
arm-gnu-toolchain-13.2.rel1-x86_64-arm-none-linux-gnueabihf.tar.xz: OK
$ sha256sum --check arm-gnu-toolchain-13.2.rel1-x86_64-arm-none-eabi.tar.xz.sha256asc
arm-gnu-toolchain-13.2.rel1-x86_64-arm-none-eabi.tar.xz: OK
Stop if either reports a missing file or mismatch; do not extract it. Check the download and matching manifest, then repeat verification. Keep both archives and manifests for your installation record. Here and later, <you> or <version> in illustrative output means a value to substitute, never literal angle brackets to type in a command.
Then extract them into ~/imx6ull/toolchains, not a system directory such as /opt. The compiler files remain part of the workspace, and removing this workspace does not remove a compiler another project installed globally.
$ mkdir -p ~/imx6ull/toolchains
$ tar -xf arm-gnu-toolchain-13.2.rel1-x86_64-arm-none-linux-gnueabihf.tar.xz \
    -C ~/imx6ull/toolchains
$ tar -xf arm-gnu-toolchain-13.2.rel1-x86_64-arm-none-eabi.tar.xz \
    -C ~/imx6ull/toolchains
After extraction, keep the directory names Arm supplied, including their capitalization. The two compiler executables are inside the corresponding bin directories:
~/imx6ull/toolchains/arm-gnu-toolchain-<version>-x86_64-arm-none-linux-gnueabihf/bin/arm-none-linux-gnueabihf-gcc
~/imx6ull/toolchains/arm-gnu-toolchain-<version>-x86_64-arm-none-eabi/bin/arm-none-eabi-gcc
If a later build reports the wrong compiler, these are the paths to check first.
Decoding the triplets
The long prefixes tell us more than “this is an Arm compiler.” They describe the environment the output is intended to use. ABI, or Application Binary Interface, means the agreement about calling conventions, register use, binary format, and runtime libraries that lets separately built code work together.
armmeans the target CPU family is 32-bit Arm.The middle
noneis the vendor field. Here it means no specific silicon vendor.linuxmeans the generated program expects a Linux target environment.gnumeans GNU userland and glibc ABI.eabimeans Embedded ABI v5.hfmeans hard-float: floating-point arguments are passed in VFP registers.
You do not need to reconstruct these names at every build. For this book, the selection is:
Use
arm-none-linux-gnueabihf-for this book’s U-Boot, kernel, and Linux user-space builds. Only user-space builds use its glibc runtime; U-Boot/kernel choose their own freestanding build rules.Use
arm-none-eabi-for our no-OS Part II experiments. Keep these two selections explicit even though some freestanding objects can be ABI-compatible across compiler families.
Environment script
Bash finds external programs by searching the directories listed in PATH, not the whole disk. One small file, env.sh, adds our compiler directories for the current terminal.
Leave ~/.bashrc unchanged. Putting the setup there would select these tools automatically in future terminals, including terminals used for other work. Instead, we will make the selection visible each time we begin a book session.
Create the file with the editor:
$ nano ~/imx6ull/scripts/env.sh
Enter the following contents. The first part names the two selected release directories and checks their compiler files; the remaining lines give this terminal the paths and names used by later builds:
#!/bin/bash

IMX6ULL_HOME="$HOME/imx6ull"
linux_dir="$IMX6ULL_HOME/toolchains/arm-gnu-toolchain-13.2.Rel1-x86_64-arm-none-linux-gnueabihf"
bare_dir="$IMX6ULL_HOME/toolchains/arm-gnu-toolchain-13.2.Rel1-x86_64-arm-none-eabi"

if [ ! -x "$linux_dir/bin/arm-none-linux-gnueabihf-gcc" ]; then
    echo "Missing executable Linux compiler in $linux_dir/bin."
    return 1
fi
if [ ! -x "$bare_dir/bin/arm-none-eabi-gcc" ]; then
    echo "Missing executable bare-metal compiler in $bare_dir/bin."
    return 1
fi

export IMX6ULL_HOME
export ARM_LINUX_TOOLCHAIN="$linux_dir"
export ARM_BAREMETAL_TOOLCHAIN="$bare_dir"

export PATH="$ARM_LINUX_TOOLCHAIN/bin:$ARM_BAREMETAL_TOOLCHAIN/bin:$IMX6ULL_HOME/build/mfgtools/uuu:$PATH"

export ARCH=arm
export CROSS_COMPILE=arm-none-linux-gnueabihf-
export BAREMETAL_CROSS_COMPILE=arm-none-eabi-

export TFTPROOT=/srv/tftp
export NFSROOT="$IMX6ULL_HOME/rootfs"

# Default direct-link lab addresses. If you use your home/office router
# instead, replace these with the real LAN addresses from Section 3.10.
export BOARD_IP=192.168.7.2
export HOST_IP=192.168.7.1
Use this file with Bash, not sh. Notice the capital R in the extracted 13.2.Rel1 directory names; the archive filenames use lowercase 13.2.rel1. Linux paths are case-sensitive. We keep Arm’s names unchanged. These exact paths select this edition’s release even if another release is present. If a check fails, resolve the missing extraction or executable before building. The file stops before changing PATH; it does not clear an earlier selection in this terminal.
There is no need to learn Bash scripting in full to understand this file. Read its parts in order:
name=valueassigns a variable;$namereads it. Quotes keep a path with spaces together.[ ... ]tests a condition.-xchecks for an executable and!means “not”. Theifbody therefore runs when that compiler is missing or not executable.return 1stops this sourced file with failure.exportmakes a variable available to programs started by this terminal.PATHis the colon-separated list of directories searched for commands, in order. Theuuudirectory is populated in Section 3.8.TFTPROOTandNFSROOTare convenient shell names; they do not configure the servers./etcconfiguration must still be edited manually.
In nano, press Ctrl-O and then Enter to save. Press Ctrl-X to return to the terminal.
Every time you open a new terminal for this book, run:
$ . ~/imx6ull/scripts/env.sh
$ echo "$?"
0
The leading dot matters. It tells Bash to read the file into this shell, which is called sourcing the file. Its exported values then apply to commands you run in this terminal. $? is the previous command’s exit status: zero means success here. Read it immediately after sourcing, before another command replaces it. If it is nonzero, stop, fix the named problem, and start a fresh terminal before trying again.
Source once when starting a terminal. Repeating it in the same terminal adds duplicate PATH entries but does not reinstall anything; after changing toolchain paths, use a fresh terminal rather than trying to clean up a stale PATH by hand.
If you instead enter bash ~/imx6ull/scripts/env.sh, the file runs in a child shell. That child’s settings cannot change the terminal you return to afterward. We also do not need to make env.sh executable: sourcing reads it as a file rather than launching it as a separate program.
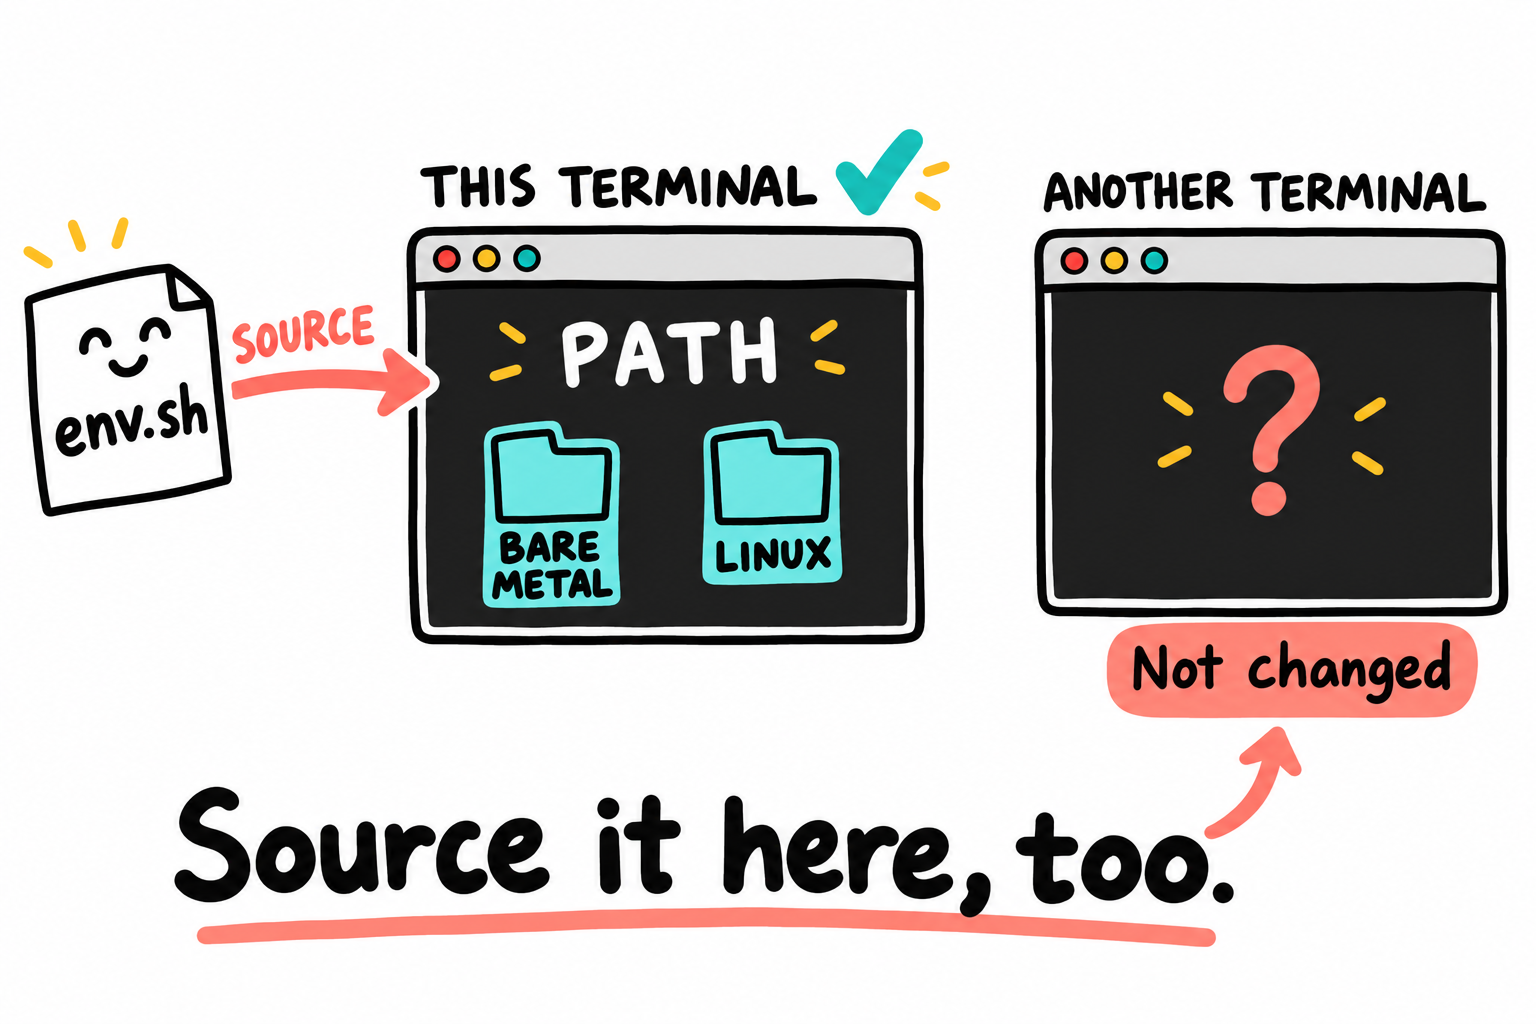
The folder symbols stand for directory names in PATH, not files copied into a terminal. Both terminals can access the same compiler files on disk. Enter . ~/imx6ull/scripts/env.sh in each independently opened terminal. A child shell can inherit exported settings, but a shell that was already open will not receive the change.
After building uuu, use the single path/version acceptance block in Section 3.11. command -v reports what this shell would select, which can be a program, alias, or function. For our compilers, expect full paths into the selected workspace directories. If the answer is surprising, type -a lists all definitions and locations of that command name.
The trailing hyphen in each prefix is intentional. Build systems append names such as gcc or objcopy to it. U-Boot, Linux, and BusyBox use CROSS_COMPILE; our own bare-metal Makefiles use the separate BAREMETAL_CROSS_COMPILE name.
3.5 Serial console
The serial console will be our way to see what the board prints. The MINI already has a USB-to-TTL bridge connected to its debug UART, so normal setup does not need an external adapter or jumper wires. Use the port labeled USB-TTL or DEBUG USB, not USB-OTG.
For now, the serial-terminal package is enough. Leave the board disconnected. Return to the commands below during Chapter 8, after its power-arrangement check. A USB cable carries power as well as data; installing a terminal does not make a guessed power connection safe. For the host-only route, continue at Section 3.8.
After connecting it, check which serial device appeared:
$ ls /dev/ttyUSB*
/dev/ttyUSB0
If that file does not exist, check dmesg | tail:
$ sudo dmesg | tail
[...] usb 1-1.2: new full-speed USB device number 5 using xhci_hcd
[...] usb 1-1.2: New USB device found, idVendor=1a86, idProduct=7523
[...] ch341 1-1.2:1.0: ch341-uart converter detected
[...] usb 1-1.2: ch341-uart converter now attached to ttyUSB0
This is illustrative CH340/ch341 output for the reference bridge. Other adapters may use cp210x or another driver. | sends dmesg output to tail, which selects the last lines; do not type the displayed log as commands. Match the newly attached bridge to its actual node, using the attachment log and /dev/serial/by-id/ where available. The suffix 0 is not a board identity; substitute the observed node in the command below.
Finding the device and having permission to open it are separate steps. On this host, access is normally restricted to root and a group such as dialout. We leave your groups unchanged and show sudo for each serial session. Ubuntu may also restrict the kernel log read by dmesg.
$ sudo picocom -b 115200 /dev/ttyUSB0
picocom v3.1
port is        : /dev/ttyUSB0
flowcontrol    : none
baudrate is    : 115200
parity is      : none
databits are   : 8
stopbits are   : 1
...
Terminal ready
Quit with Ctrl-A then Ctrl-X. Plain Ctrl-C sends the interrupt character to the target; Ctrl-A then Ctrl-C instead toggles local echo. These keys follow picocom’s manual.
“Terminal ready” means the host opened the port; it does not promise a message from the board. Our own bootable image does not exist yet, so silence is normal. A pre-installed factory image may print something; save that output if it does. Later, when our UART program is supposed to print, unreadable text is a reason to check 115200 8N1, the device path, and the USB cable.
If a board revision has no built-in bridge, an appropriate 3.3 V USB-TTL adapter is an alternative. Use the matching header definition: board TX to adapter RX, board RX to adapter TX, and GND to GND; leave adapter VCC disconnected. VCC is not the only back-powering path: a driven TX/RX line can feed an unpowered board through its input protection. Disconnect the adapter for a cold cycle and follow the supplier’s permitted connection order; do not drive an unpowered endpoint.
3.5a Windows-side serial terminals (for Windows-mainly readers)
For an optional Windows-side serial session, PuTTY provides a serial connection: select the bridge’s COM port in Device Manager, choose Serial, and set 115200 8N1 with no flow control. This does not substitute for attaching USB devices to Ubuntu when using the Linux build/transfer commands.
Other optional terminals include:
MobaXterm (
mobaxterm.mobatek.net, free Home Edition) combines SSH, serial, X server, saved sessions, and SFTP.SecureCRT (
vandyke.com, commercial) provides fast scrollback, saved sessions, and a configurable keymap.PuTTY (
putty.org, free) provides a small serial and SSH client.Tera Term (
teratermproject.github.io, free) provides serial access and a macro language.
The board’s integrated bridge may use a CH340 or CP2102 device. Windows may need the corresponding driver from wch.cn or silabs.com. Linux normally includes both drivers.
When configuring any of these tools, the settings are the same we used for picocom: 115200 8N1, no flow control.
3.6 TFTP server
Once U-Boot is running, think about the next ten kernel builds. Moving the card from board to host and back for every image soon becomes more work than the small code change you wanted to test. TFTP lets U-Boot fetch the file from the host over Ethernet instead. This section prepares that host service; it can wait until Chapter 24.
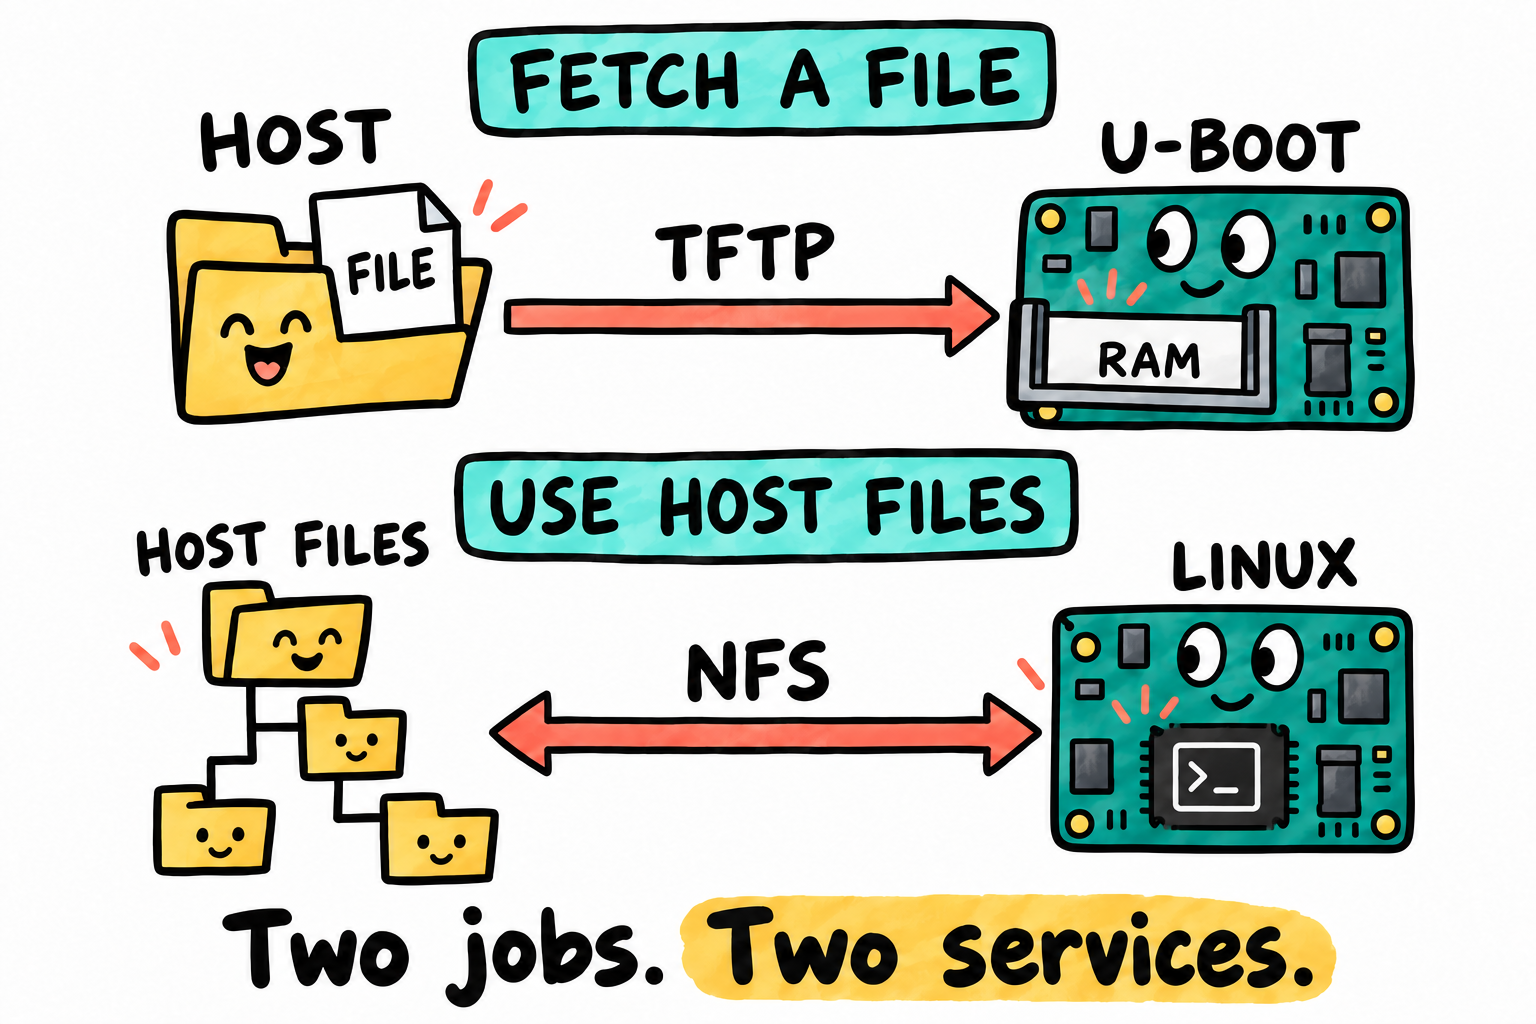
A TFTP file travels to the board. With NFS, the directory stays on the host and the board accesses its files over the network. Linux may cache some of that data locally. These are the roles we choose for the later labs, not exclusive capabilities of either protocol. Neither service is needed for the first LED experiment.
Unlike env.sh, a network service continues independently of this terminal. Keep a record of the existing configuration, preserve unrelated settings, and use an isolated lab link. Work through the address plan in Section 3.10 before restarting a server bound to that address. Do not expose these services on a public or shared network.
Record systemctl is-active tftpd-hpa and systemctl is-enabled tftpd-hpa before installation. A missing unit is normal on a fresh host. A server package can start immediately and enable future startup; stop alone does not undo that. Install on the isolated lab system, not a machine running a shared TFTP service. For a newly installed, lab-only server, stop it and disable automatic startup before editing its configuration:
Install the server package if you have not already:
$ sudo apt install tftpd-hpa tftp-hpa
$ sudo systemctl disable --now tftpd-hpa
On the reference host, systemctl also coordinates this package’s legacy startup arrangement. Record the command’s confirmation and inspect is-active/is-enabled again; do not infer reboot behavior from current inactivity. Restore the original state if the service predated this example.
Now open the server configuration:
$ SUDO_EDITOR=nano sudoedit /etc/default/tftpd-hpa
SUDO_EDITOR=nano chooses the familiar editor for this command only. sudoedit lets you edit a temporary copy as your normal user, then writes it back with authorization. Save and exit with the same nano keys used earlier; your shell’s default editor is not changed.
Set the four fields as follows for the direct-link address plan:
TFTP_USERNAME="tftp"
TFTP_DIRECTORY="/srv/tftp"
TFTP_ADDRESS="192.168.7.1:69"
TFTP_OPTIONS="--secure"
Each line answers one setup question:
TFTP_USERNAME="tftp"runs the daemon as the unprivilegedtftpuser.TFTP_DIRECTORY="/srv/tftp"is the directory U-Boot will read files from.TFTP_ADDRESS="192.168.7.1:69"listens only on the host lab address and standard UDP port. Configure that address using Section 3.10 before restarting; router mode must use the actual host address.TFTP_OPTIONS="--secure"roots requests inside/srv/tftp. This book downloads existing files, so it does not enable new-file uploads with--create; that option would not grant filesystem write permission anyway.
Create the directory, make your normal user its owner, and keep it readable by the TFTP daemon:
$ sudo mkdir -p /srv/tftp
$ sudo chown "$USER:$(id -gn)" /srv/tftp
$ chmod 755 /srv/tftp
There are two users involved here, and they want different things. You need to put new images in the directory. The tftp service needs to read them, but does not need your authority to change the host. The ownership and permission commands arrange that distinction:
/srvis a system directory. Withoutsudo, a normal user usually cannot create/srv/tftp.After
sudo mkdir, the new directory is owned byroot, so your normal user would needsudoevery time you copy a kernel, device tree, or U-Boot image into it.sudo chown "$USER:$(id -gn)" /srv/tftpselects your user and actual primary group.$()substitutes command output;id -gnprints that group. Now you can stage files with normalcpcommands. Change ownership only for this dedicated lab directory, not an existing shared service directory.The TFTP server does not run as your user.
TFTP_USERNAME="tftp"means it runs as the low-privilegetftpuser, so a bug in the TFTP server has less power on the host.chmod 755 /srv/tftpgrants the owner read/write/execute and others read/execute. For a directory, read lists names and execute permits traversal to a named file; the file itself must separately be readable. Other ordinary users cannot add files, though root still can.
Files you copy into /srv/tftp also need to be readable by the TFTP daemon. Normal files created by cp or echo are usually readable already. If U-Boot gets “permission denied” from TFTP, check with:
$ ls -l /srv/tftp
If a staged file is not readable by tftp, change that file’s mode, not the whole tree. The smoke test below demonstrates chmod 644: owner read/write, others read.
With the address and configuration checked, start the service deliberately:
$ sudo systemctl start tftpd-hpa
$ systemctl is-active tftpd-hpa
active
Before involving the board, retrieve one small file from the host’s own server:
$ echo "hello tftp" > /srv/tftp/test.txt
$ chmod 644 /srv/tftp/test.txt
$ mkdir -p ~/imx6ull/build/tftp-check
$ cd ~/imx6ull/build/tftp-check
$ tftp 192.168.7.1 -c get test.txt
$ cat test.txt
hello tftp
echo prints the text; the shell’s > writes it to a file, replacing existing contents. Use this dedicated test filename. The TFTP client saves its download in this terminal’s current directory, then cat displays it. Use your actual host address in router mode.
If this works, the local service can read and serve the file. The board-to-host cable, firewall path, and VM reachability still need a target transfer. We make that check after U-Boot runs in Chapter 24.
Firewall: keep the existing firewall enabled. Inspect sudo ufw status; where UFW is active, allow the board only on the dedicated lab interface, substituting the interface name found in Section 3.10:
$ sudo ufw allow in on enp0s31f6 from 192.168.7.2 to 192.168.7.1 port 69 proto udp
TFTP uses additional UDP transfer ports; UDP/69 alone is not proof that the whole exchange is allowed. If a restart or transfer fails, first check the host address, then systemctl status tftpd-hpa --no-pager and sudo journalctl -u tftpd-hpa -n 30 --no-pager. Next inspect the file permissions, VM attachment, and firewall policy. Do not disable workstation protection to make the symptom disappear.
After a development session, stop the server and recheck both its active and enabled states. Restore only the prior configuration and firewall rules you changed. A service installed just for these examples should remain disabled; an existing shared service needs its recorded original state instead.
3.7 NFS server
TFTP saves us a trip with the SD card, but it still transfers individual files. What if Linux could use a directory on the host as its root filesystem? NFS, the Network File System, allows that. During development, the host can hold the target’s files, and the board can read an updated file without needing a new SD-card image.
The later kernel and root-filesystem chapters explain NFS-root boot. This host-side example describes which directory the board may access and the trust that export grants.
Use a disposable lab VM for this recipe, with no personal files or shared host folders. During installation, use only the VM’s outbound NAT connection without incoming port forwards, not a bridged public/shared uplink. Before starting the lab server, disconnect that uplink and use the dedicated target link, or an isolated lab router. Do not run this trusting development export on your everyday home/work LAN.
Record the existing active/enabled states of nfs-kernel-server and related RPC units. If they serve other work, use a separate VM rather than reconfiguring them. Packages can start services immediately; on a new lab-only VM, stop and disable the newly installed server before configuration:
Install the server package if needed:
$ sudo apt install nfs-kernel-server
$ sudo systemctl disable --now nfs-kernel-server
Open the export table:
$ SUDO_EDITOR=nano sudoedit /etc/exports
Add one line at the end. Replace <you> with your Linux username:
/home/<you>/imx6ull/rootfs 192.168.7.2(rw,sync,no_root_squash,no_subtree_check)
Then apply and verify:
$ sudo exportfs -ar
$ sudo systemctl restart nfs-kernel-server
$ sudo showmount -e localhost
Export list for localhost:
/home/<you>/imx6ull/rootfs 192.168.7.2
What the commands do:
exportfs -arasks the NFS server to re-read/etc/exportsand apply the export table.systemctl restart nfs-kernel-serverrestarts the NFS daemon so the kernel-side service is using the current config.showmount -e localhostchecks the advertised export, not whether the target can mount or boot it. Target acceptance also depends on the kernel, network path, boot arguments, and root filesystem described later.
The options in the export line determine what that access means:
rwlets the target write to the exported filesystem.synccommits writes before the server replies. This is slower but reduces the chance of losing recent writes.no_root_squashmaps the target’s root user to host UID 0. This is convenient for a development root filesystem but unsafe on an untrusted network.no_subtree_checkavoids subtree checks that can complicate renamed-file handling. It is a development tradeoff, not a claim that the directory is a secure boundary.
Security: this recipe trusts the target. Its IP address is not authentication, and no_root_squash accepts its root identity as host UID 0. A subdirectory export is not a strong sandbox; filehandle attacks can reach outside the intended tree under some configurations. Do not reassure yourself that personal files outside rootfs/ are protected by this path. Do not execute target-controlled files on the host. See exports(5), Subdirectory Exports.
Export authorization, listener addresses, and firewall rules are separate checks. NFS/RPC can listen on interfaces other than the lab link. Inspect sudo ss -lntup, rpcinfo -p localhost, and the existing firewall policy before and after startup. NFSv3 uses RPC services and may require additional ports; allowing only 2049 is not a complete recipe. If the isolated topology or allowed listener path is uncertain, leave the server stopped. Check systemctl status nfs-kernel-server --no-pager and sudo journalctl -u nfs-kernel-server -n 30 --no-pager before blaming a target mount failure.
To undo this example export, remove only its line from /etc/exports with sudoedit, then run sudo exportfs -ar. Stop the lab-only server and inspect activity, startup enablement, and remaining RPC listeners; stopping NFS does not promise every RPC socket is gone. Restore recorded states for pre-existing services. In the disposable VM, disable newly installed lab-only services, including rpcbind.service/rpcbind.socket if no other RPC work needs them. Do not erase a pre-existing export table or stop services other users require.
3.8 USB-OTG flashing tools
Our first program cannot depend on a bootloader we have not built yet. Fortunately, there is already code in the chip: the Boot ROM. In USB boot mode it exposes SDP, the Serial Download Protocol, through USB-OTG and waits for a host tool to send an image. We use NXP’s uuu to reach that starting point, even when storage has no working image.
uuu (Universal Update Utility)
Build NXP’s uuu_1.5.201 release inside the workspace. Selecting a release keeps these instructions tied to known sources. The package-install command needs sudo; the source checkout and build run as your normal user:
$ cd ~/imx6ull/src
$ git clone --branch uuu_1.5.201 --depth 1 https://github.com/nxp-imx/mfgtools
$ sudo apt install libusb-1.0-0-dev zlib1g-dev libbz2-dev pkg-config cmake libzstd-dev libtinyxml2-dev
$ cmake -S ~/imx6ull/src/mfgtools -B ~/imx6ull/build/mfgtools
$ cmake --build ~/imx6ull/build/mfgtools -j "$(nproc)"
$ . ~/imx6ull/scripts/env.sh
$ command -v uuu
/home/<you>/imx6ull/build/mfgtools/uuu/uuu
$ uuu -h
... help text and the selected release version ...
cmake -S ... -B ... reads sources from one directory and generates the build in another. The next command performs that build; nproc supplies the available CPU count for parallel jobs. The result stays under build/mfgtools, with no installation into /usr/local/bin. The dependency list comes from this release’s CMake requirements, including zlib and TinyXML2 development files.
The final path is worth noticing: the build directory contains a subdirectory named uuu, and the executable inside it is also named uuu. For restricted USB access, we leave groups and udev rules unchanged and use sudo. Give it the full local path because its command search path may not include our workspace:
$ sudo "$IMX6ULL_HOME/build/mfgtools/uuu/uuu" -lsusb
Run this device check only after Chapter 8’s power and USB-mode checks. 15a2:0080 is the ROM SDP identity. Enumeration proves device visibility, not successful image transfer or code execution. Read any flashing command before running it with root credentials.
3.9 SD card preparation for later chapters
The SD-boot examples assume a spare 4-32 GB SD card, class 10 or better, with no data to preserve. Raw image writes overwrite its contents. This section explains device identification only, not an image-writing operation.
Identify which device it is, carefully:
$ lsblk -o NAME,PATH,SIZE,MODEL,SERIAL,TRAN,RM,TYPE,MOUNTPOINTS
Read your actual output: PATH is the device path, TYPE distinguishes a whole disk from a part partition, and MOUNTPOINTS shows what is mounted. The later examples use /dev/sdc with a /dev/sdc1 partition, but your card may have different names.
Here, a command finishing successfully can be the wrong result. dd can write perfectly good image bytes to a perfectly valid device path that happens to be your system disk. It cannot decide which disk you meant. Compare identity, size, and mount points before every write, not just during this first setup.
Compare the device list before and after insertion. Match size, model/serial, and the newly appearing reader/card; RM=1 alone is not proof. Reject a device containing /, /boot, swap, or unrelated mounted data. A host disk can be /dev/sdb; a card can be /dev/sda or /dev/mmcblkN. Disk letters do not establish safety.
Do not write or repartition the card here. Chapter 11 explains the image and its placement contract. A whole-disk path and a partition path are not interchangeable, and a raw .imx payload is not a partitioned Linux card image. The later case study distinguishes its selected format from the verification of written bytes; a partition list alone cannot verify raw boot code.
Before any later write or physical removal, close programs using the card and unmount every mounted card partition. If an unmount fails or a mount point remains, stop; do not use forced/lazy unmount to get past the warning. During an actual write, stop on any write error and require successful completion before flushing or removing the card. sync succeeding after a failed write does not make that write complete. We keep identification and writing manual, without a disk-selection script.
3.10 Host IP plan
For TFTP, NFS, and U-Boot experiments, the board needs an address for the host. That address must stay stable so a working command does not suddenly point to the wrong machine.
Choose the arrangement that matches your desk. The direct link is the isolated lab setup used in our examples; a router-connected setup needs its own consistent addresses.
Option A: direct host-to-board link
Use this when your computer has a spare Ethernet port, a USB-to-Ethernet adapter, or Wi-Fi for internet plus Ethernet for the board.
For the direct link, our example addresses are:
Host: 192.168.7.1
Board: 192.168.7.2
Use this private 192.168.7.0/24 subnet only if it does not overlap an existing LAN or VPN route. It avoids router DHCP changes when assigned to a dedicated adapter.
/24 means the first 24 address bits identify the network. Inspect ip -4 route before choosing it: an existing LAN or broader VPN route may already cover these addresses. In a VM, inspect the Ubuntu guest’s routes and adapters, not Windows’s. Correlate ip -br link with the adapter you physically assigned to the lab; an interface name alone does not identify its cable.
If you use NetworkManager:
$ sudo nmtui
In the text UI:
Choose Edit a connection.
Create a separate Ethernet connection named
imx-linkrather than overwriting your everyday connection. In its Device field, select the identified lab adapter, not your internet adapter.Set IPv4 CONFIGURATION to Manual.
Add address
192.168.7.1/24.Leave gateway and DNS empty for this direct board link.
Save, return to Activate a connection, and activate
imx-link. This creates a persistent profile. After the lab, deactivate it and reactivate the recorded previous profile through the same menu; remove onlyimx-linkif it is no longer needed.
enp0s31f6 below is an example host interface name, not the board interface. Substitute your adapter’s actual name.
Verify:
$ ip -4 addr show enp0s31f6
... inet 192.168.7.1/24 ...
$ ip -4 route get 192.168.7.2
... dev enp0s31f6 src 192.168.7.1 ...
Require the expected lab device and source address in your actual route result before starting a bound server. Leaving the IPv4 gateway blank avoids adding an IPv4 default route for this direct link; it does not remove an existing VPN route or prove service isolation.
Option B: board and host on your existing router
Use this when your computer has only one Ethernet port and it already connects to your Wi-Fi modem or home router. In that case, do not force the host to 192.168.7.1. Leave the host on the router’s LAN, usually something like 192.168.1.x, and plug the i.MX6ULL board into the same router or switch.
For the network-server examples, use an isolated development router/network rather than opening the trusting NFS recipe on the household or office LAN. Being on the same subnet establishes neither trust nor a safe listener/firewall boundary. If the required isolation is unavailable, postpone those services and use the non-network boot route.
Example:
Router: 192.168.1.1
Host: 192.168.1.23
Board: 192.168.1.50
Find the host’s current LAN address:
$ ip -4 addr
Look for the address on the interface connected to the router. In later U-Boot commands, this host address becomes serverip.
Reserve the host address as well as the board address in the router, or use documented unused static addresses outside its DHCP pool. Update HOST_IP/BOARD_IP in env.sh, then source it in a fresh shell. Update the TFTP bind address, NFS client address, and any lab firewall rule’s interface/source/destination consistently; remove only the superseded lab rule. For the board address:
Reserve a fixed DHCP address for the board in your router.
Let U-Boot request DHCP, then read the assigned address.
Choose an unused static address outside the router’s DHCP pool.
Router mode is practical, but it has two drawbacks:
DHCP can change the board address unless you reserve it.
Some routers isolate clients, especially guest Wi-Fi networks. If TFTP or ping fails even though both devices have
192.168.1.xaddresses, check client isolation and firewall settings.
Throughout the book, commands may show the direct-link values:
serverip=192.168.7.1
ipaddr=192.168.7.2
If you use router mode, substitute your real LAN values instead:
serverip=<your host IP, for example 192.168.1.23>
ipaddr=<your board IP, for example 192.168.1.50>
Chapter 8 checks physical Ethernet presence only. Target ping and TFTP tests wait until U-Boot runs; NFS-root acceptance waits until Linux and a complete rootfs exist.
3.11 Sanity check
Return to a fresh terminal and follow the selection from beginning to end: source env.sh, find both compilers, and find uuu. The listings below show the shape of the output. Your own paths and version strings are the evidence to keep; the placeholders are not output you need to reproduce.
$ . ~/imx6ull/scripts/env.sh

$ command -v arm-none-linux-gnueabihf-gcc
/home/<you>/imx6ull/toolchains/arm-gnu-toolchain-13.2.Rel1-x86_64-arm-none-linux-gnueabihf/bin/arm-none-linux-gnueabihf-gcc

$ arm-none-linux-gnueabihf-gcc --version | head -1
arm-none-linux-gnueabihf-gcc (Arm GNU Toolchain 13.2.rel1 (Build arm-13.7)) 13.2.1 20231009

$ command -v arm-none-eabi-gcc
/home/<you>/imx6ull/toolchains/arm-gnu-toolchain-13.2.Rel1-x86_64-arm-none-eabi/bin/arm-none-eabi-gcc

$ arm-none-eabi-gcc --version | head -1
arm-none-eabi-gcc (Arm GNU Toolchain 13.2.rel1 (Build arm-13.7)) 13.2.1 20231009

$ command -v dtc mkimage picocom uuu
/usr/bin/dtc
/usr/bin/mkimage
/usr/bin/picocom
/home/<you>/imx6ull/build/mfgtools/uuu/uuu

$ ls -d ~/imx6ull/{src,build,boot,rootfs,scripts,toolchains,notes}
/home/<you>/imx6ull/boot
/home/<you>/imx6ull/build
/home/<you>/imx6ull/notes
/home/<you>/imx6ull/rootfs
/home/<you>/imx6ull/scripts
/home/<you>/imx6ull/src
/home/<you>/imx6ull/toolchains
| head -1 sends the version output to head, selecting its first line. Require both paths to name the selected 13.2.Rel1 directories and both banners to identify 13.2.rel1. The case difference is Arm’s naming, not a reason to rename anything. An unexpected alias/function or system path is a reason to inspect type -a, not continue with whichever compiler happens to run.
This completes the host-only check. During Chapter 8, identify the serial bridge and confirm ROM USB enumeration after the power checks. Card identity is recorded before SD boot, without writing it here.
For a network-boot configuration, each service has its own state: systemctl is-active tftpd-hpa and systemctl is-active nfs-kernel-server report them separately. A combined multi-unit query can return success when only one unit is active. The address/route, host-local TFTP retrieval, export, listener isolation, and startup state describe different host-side properties. None replaces target transfers or boots, and these services are not required by Chapter 9’s USB route.
3.12 Key Notes
Compiler installation and compiler selection are separate state.
. ~/imx6ull/scripts/env.shchanges the current Bash shell and its future children, not another already-open terminal. Running the file in a child shell cannot change its parent.The two Arm 13.2.Rel1 archives remain project-local with Arm’s extracted names.
CROSS_COMPILEselects the Linux-target tools, whileBAREMETAL_CROSS_COMPILEselects the no-OS tools. A prefix has meaning only when command lookup reaches the intended executable.Sources, generated outputs, staged boot files, and the target root filesystem have different owners and lifetimes. Creating
rootfs/does not export it, and exporting it does not supply the kernel or a usable PID 1.Package installation, network profiles, and services persist beyond a terminal. TFTP transfers boot files into target RAM, whereas NFS supplies ongoing access to a host tree. Listener binding, firewall policy, and export authorization are separate controls.
The illustrated
no_root_squashNFS export trusts target root as host UID 0. An IP address is not authentication, and a subdirectory is not a strong sandbox. This configuration belongs on an isolated disposable system without personal files or shared host folders.Normal builds need no root credentials. Explicit
sudois confined to restricted devices or host configuration. A serial port opening, ROM USB enumeration, and a host-local transfer each establish only their own interface boundary.Storage paths identify current kernel objects, not a permanent physical card. Whole disks and partitions are distinct targets. Raw writes require fresh identity and unmount checks, and a successful
synccannot repair a failed write.
3.13 Pitfalls
tftpblocked by firewall. A blocking policy/rule can drop the request or later transfer traffic. Inspectsudo ufw statusand the actual policy; enabled UFW is not by itself proof that this traffic is blocked.NFS-root failure. Prefer the wired lab link. For “VFS: Unable to mount root fs”, inspect the full preceding error,
root=/nfsroot=/ip=arguments, built-in NFS/network support, host exports/firewall, and rootfs contents. That message alone does not identify a timeout.Forgot to source
env.sh. Ifarm-none-linux-gnueabihf-gccorarm-none-eabi-gccis not found, run. ~/imx6ull/scripts/env.shin that terminal.Wrong compiler on
PATH.command -v arm-none-linux-gnueabihf-gccandcommand -v arm-none-eabi-gccmust both point into the selected workspace release. If either selects a system path, alias, or function, fix the environment before building.Wrong storage destination. Stop if identity is uncertain. No disk-letter filter can distinguish a spare card from a host disk; repeat identification and unmount checks at each write.
Building with
sudo. Build as the normal user. Plainsudo makemay lose inherited compiler selection and creates root-owned output. Explicit assignments such assudo CROSS_COMPILE=...can work subject to sudo policy, but are not a reason to build as root or disableenv_reset. Usesudoonly for the specific restricted operation.
3.14 Going deeper
man 8 exportfs,man 5 exports, andman 8 tftpdexplain the optional services configured in this chapter.In picocom,
-ldisables locking,-iskips initialization, and-tsends an initialization string. They are not needed for the normal console command; do not add options without checking the manual.The TCP/IP Guide (Charles Kozierok) on TFTP and NFS protocols if you want to know what is on the wire.
For frequent cross-builds,
ccachecan reuse previous compilation results. Leave it out of the first experiments so the compile commands and rebuild decisions remain easy to follow. Add it later only after checking how the project’s build system selects its compiler.
We can now trace a compiler name to a real file and explain why we source the environment script at the start of a session. The next uncertainty is on the other end of the build. The Cortex-A7 accepts familiar-looking instructions, but it does not enter an interrupt like a Cortex-M. That difference is where Chapter 4 begins.